SpatialMap_SparseSpatialMap
Demonstrate how to use sparse SpatialMap.
Demonstrate how to create sparse SpatialMap
Demonstrate how to put virtual objects onto SpatialMap
Demonstrate how to preview persistence contents
Demonstrate how to localize multiple maps and show contents on them
Reference: Motion Tracking and EasyAR Features.
Configurations
Server access information is required when using sparse spatial map, which can be get from SpatialMap page in EasyAR develop center. There are two ways to set this information in Unity.
One is global configuration, all scenes using global spatial map configuration will use this value. Select <EasyAR -> Sense -> Configuration> in Unity menu,

and enter the information in Project Settings get from develop center,
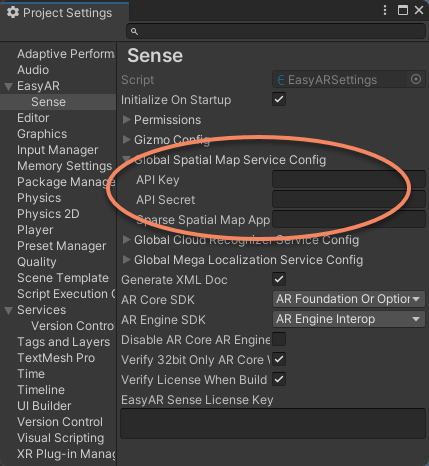
Another is local configuration in the scene, it is only valid to the current scene.

How to Use
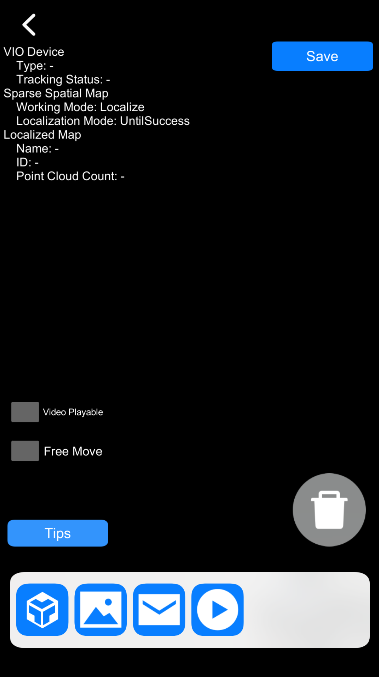
Main view
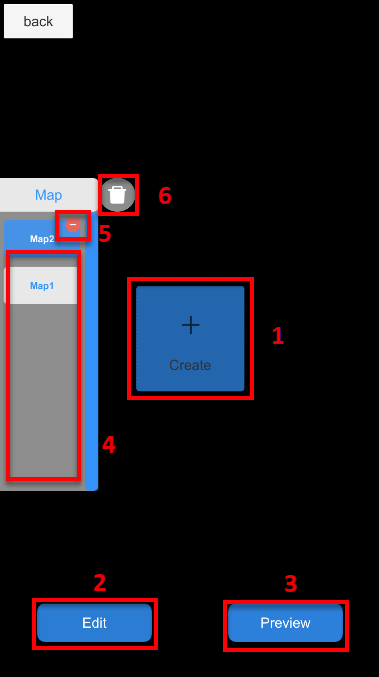

Click the black part of the view can collapse and expand the map list.
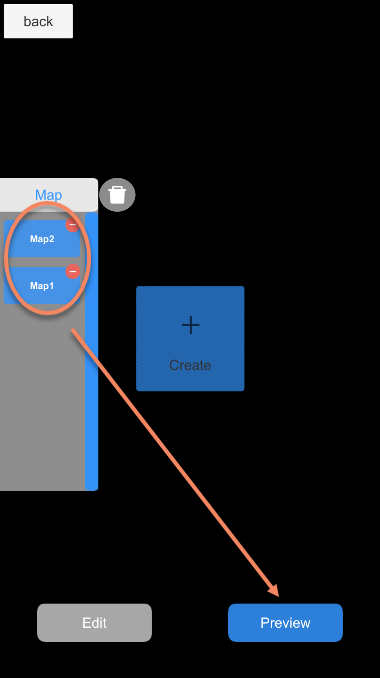
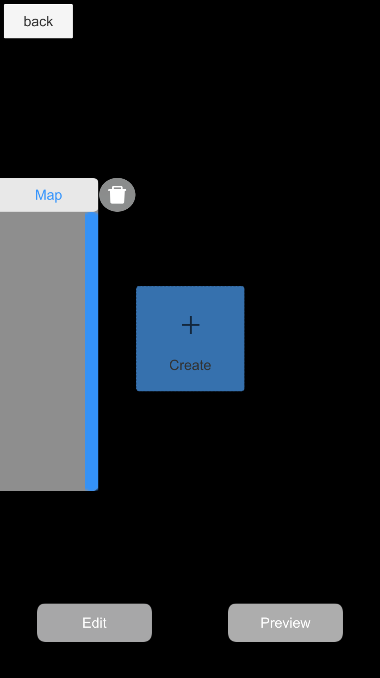
The map list is empty at beginning and filled with maps after create.
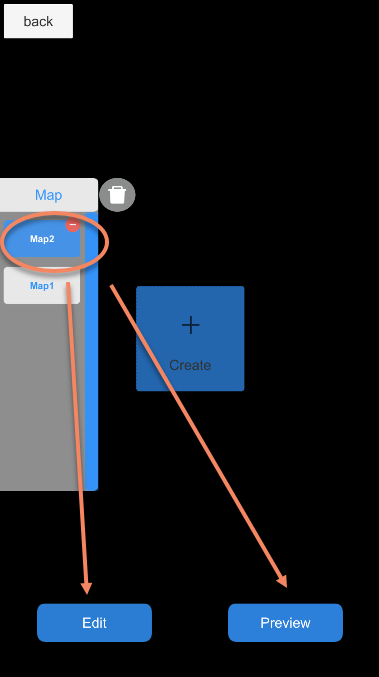
Select one map from the list, then click Edit to put 3D content and click Preview to preview the contents.
Select multiple maps from the list, only preview can be clicked, and this sample will detect and track all maps.
Create view
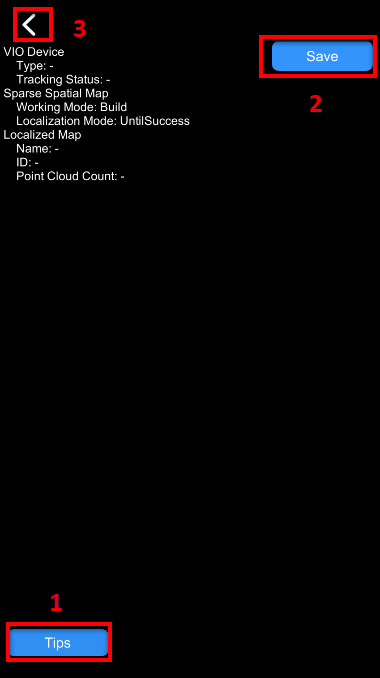
Edit view
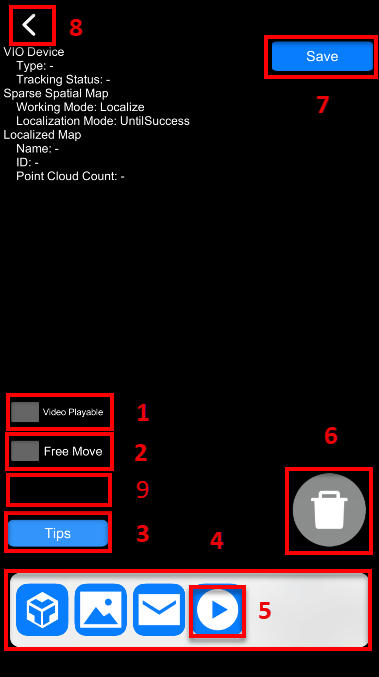
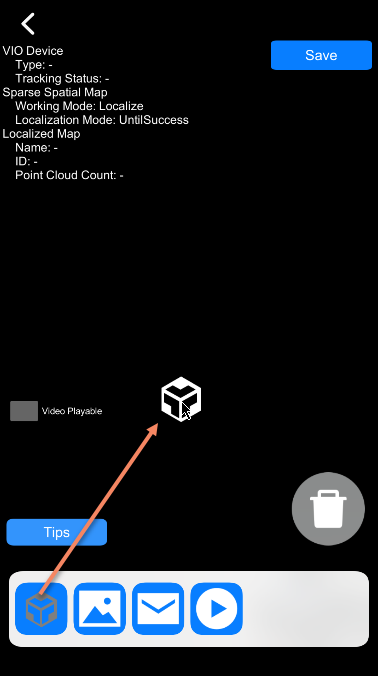
Templet icon can be dragged into the scene. If there is a map localized, drag the icon on the point cloud will generate an object in 3D scene. You can drag it multiple times and multiple objects will be created.
Contents of the preset four buttons are cube, namecard image, red packet model and video.
Preview view
How It Works
Active ARSession
In this sample, ARSession is not activated in the scene when start.
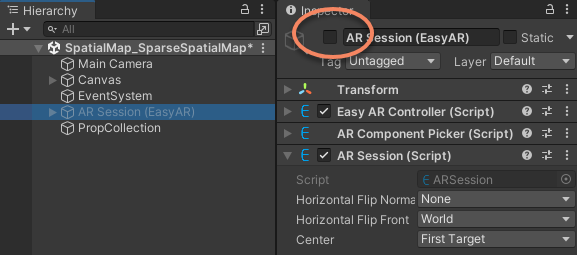
It will be copied each time enter sub views from the main view. A MapSession defined in this sample will be created in the same time to handle data associated with the ARSession.
easyarObject = Instantiate(EasyARSession);
easyarObject.SetActive(true);
session = easyarObject.GetComponent<ARSession>();
mapFrameFilter = easyarObject.GetComponentInChildren<SparseSpatialMapWorkerFrameFilter>();
mapSession = new MapSession(session, mapFrameFilter, selectedMaps);
Setup map to be build
When the create view is about to open, a map is created to handle map building data in the view. It is a instantiated from SparseSpatialMap prefab, with SparseSpatialMapController.SourceType set to SparseSpatialMapController.DataSource.MapBuilder and SparseSpatialMapController.MapWorker set to the SparseSpatialMapWorkerFrameFilter in the session. To make the build process visible, SparseSpatialMapController.ShowPointCloud is set to true.
public void SetupMapBuilder(SparseSpatialMapController mapControllerPrefab)
{
    builderMapController = UnityEngine.Object.Instantiate(mapControllerPrefab);
    builderMapController.SourceType = SparseSpatialMapController.DataSource.MapBuilder;
    builderMapController.MapWorker = MapWorker;
    builderMapController.ShowPointCloud = true;
}
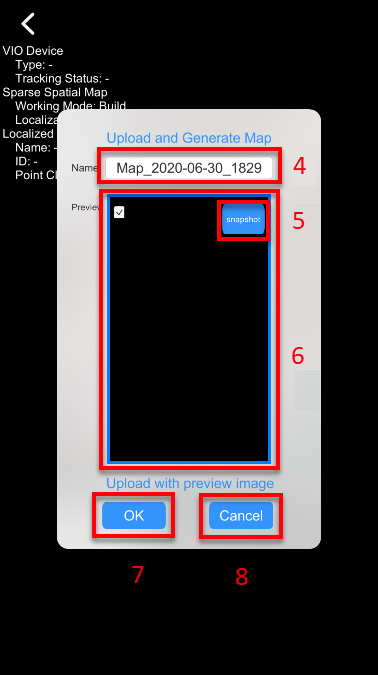
Create preview image
When saving the map, preview image can be uploaded in the same time. Create image from what the camera renders would be very easy. Create a Buffer from texture, and then create image from that buffer. Do not forget to Dispose underlying data after operation or use using semantic to do this.
using (var buffer = easyar.Buffer.wrapByteArray(capturedImage.GetRawTextureData()))
using (var image = new easyar.Image(buffer, PixelFormat.RGB888, capturedImage.width, capturedImage.height))
{
    mapSession.Save(mapName, withPreview ? image : null);
}
Save map
MapWorker.BuilderMapController.Host is used to save the map. It may generate exceptions. The host procedure may take some time, so SparseSpatialMapWorkerFrameFilter.BuilderMapController.MapHost is used to get result asynchronously.
public void Save(string name, Optional<Image> preview)
{
    IsSaving = true;
    MapWorker.BuilderMapController.MapHost += (map, isSuccessful, error) =>
    {
        ...
        IsSaving = false;
    };
    try
    {
        MapWorker.BuilderMapController.Host(name, preview);
    }
    catch (Exception e)
    {
        ...
        IsSaving = false;
    }
}
Notice: map name can be changed on website, while the SDK side will not get updated until map cache cleared, and a re-download has been triggered.
There are also some local data in the sample saved after the map successfully saved. This data records the map access information from server so that a later edit or preview can be done using maps from server.
MapWorker.BuilderMapController.MapHost += (map, isSuccessful, error) =>
{
    if (isSuccessful)
    {
        var mapMeta = new MapMeta(map, new List<MapMeta.PropInfo>());
        MapMetaManager.Save(mapMeta);
        ...
    }
    ...
};
Setup maps to be localize
When the edit view or preview view is about to open, a few maps are loaded to be localized. They are about to load from the server, so SparseSpatialMapController.SourceType is set to SparseSpatialMapController.DataSource.MapManager. SparseSpatialMapController.MapManagerSource is set to the data previously saved locally while saving map and SparseSpatialMapController.MapWorker set to the SparseSpatialMapWorkerFrameFilter in the session.
In edit view, the map is set to be visible by default, SparseSpatialMapController.ShowPointCloud is set to true, and in preview view it is set in the oppisite way. This value can be changed in real time by Point Cloud buttons.
public void LoadMapMeta(SparseSpatialMapController mapControllerPrefab, bool particleShow)
{
    ...
    foreach (var m in Maps)
    {
        var meta = m.Meta;
        var controller = UnityEngine.Object.Instantiate(mapControllerPrefab);
        controller.SourceType = SparseSpatialMapController.DataSource.MapManager;
        controller.MapManagerSource = meta.Map;
        controller.MapWorker = MapWorker;
        controller.ShowPointCloud = particleShow;
        ...
        m.Controller = controller;
    }
}
Start map localization
The localize can be started when the SparseSpatialMapWorkerFrameFilter.Localizer.startLocalization is called. By default, the localize will stop once success.
public void LoadMapMeta(SparseSpatialMapController mapControllerPrefab, bool particleShow)
{
    ...
    MapWorker.Localizer.startLocalization();
}
Setup map localizer for multiple maps
To localize multiple maps in the scene, the localize must not stop. So SparseSpatialMapWorkerFrameFilter.LocalizerConfig.LocalizationMode is set to LocalizationMode.KeepUpdate when multiple maps are selected. This will take effect after a following SparseSpatialMapWorkerFrameFilter.Start or SparseSpatialMapWorkerFrameFilter.OnEnable is called. In this sample, we are sure about this according to the calling sequence.
if (Maps.Count > 1)
{
    MapWorker.LocalizerConfig.LocalizationMode = LocalizationMode.KeepUpdate;
}
Current localized map when localize multiple maps
To make the localize switch between maps visible, map color is changed when it is localized or stopped localize.
controller.MapLocalized += () =>
{
    GUIPopup.EnqueueMessage("Localized map {name = " + controller.MapInfo.Name + "}", 3);
    var parameter = controller.PointCloudParticleParameter;
    parameter.StartColor = new Color32(11, 205, 255, 255);
    controller.PointCloudParticleParameter = parameter;
};
controller.MapStopLocalize += () =>
{
    GUIPopup.EnqueueMessage("Stopped localize map {name = " + controller.MapInfo.Name + "}", 3);
    var parameter = controller.PointCloudParticleParameter;
    parameter.StartColor = new Color32(163, 236, 255, 255);
    controller.PointCloudParticleParameter = parameter;
};
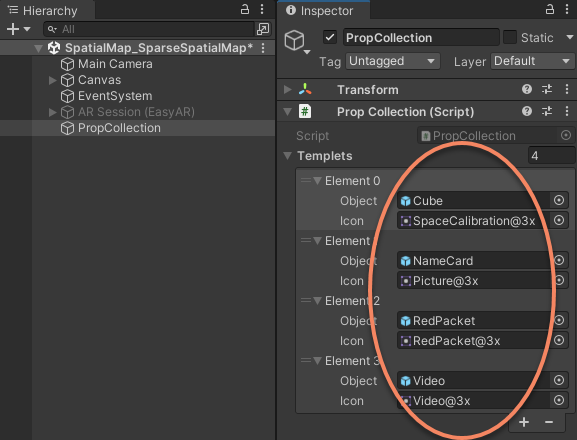
Prop collections
This sample defined a PropCollection class to handle the templet that can be dragged and instantiated in the scene.
public class PropCollection : MonoBehaviour
{
    ...
    public List<Templet> Templets = new List<Templet>();
    ...
    [Serializable]
    public class Templet
    {
        public GameObject Object;
        public Sprite Icon;
    }
}
If you want to try another object before a deep dig into the sample, you can simply add your prefer object in the Inspector. What you need to do is add a object prefab and an icon which will be displayed at the bottom bar and avoid the name of object to be duplicated.
Move object on point cloud
You can perform hit test on the sparse spatial map and move object to the returned point. Transform the point to map local so that it can stick to the map.
var point = mapSession.HitTestOne(new Vector2(Input.touches[0].position.x / Screen.width, Input.touches[0].position.y / Screen.height));

public Optional<Vector3> HitTestOne(Vector2 pointInView)
{
    ...
    foreach (var point in MapWorker.LocalizedMap.HitTest(pointInView))
    {
        return MapWorker.LocalizedMap.transform.TransformPoint(point);
    }
    ...
}
The object position is adjusted to sit on top of the point cloud.
candidate.transform.position = point.Value + Vector3.up * candidate.transform.localScale.y / 2;
Map meta
This sample defined a MapMeta class to handle all objects put on the map, to save and load together so all objects will still be there when you open the view next time using the same map. It will store the map itself used for server access and object transform to the map.
This sample store this data in local device. If you store it on a webserver, a map and content sharing would be done.
[Serializable]
public class MapMeta
{
    public SparseSpatialMapController.MapManagerSourceData Map = new SparseSpatialMapController.MapManagerSourceData();
    public List<PropInfo> Props = new List<PropInfo>();
    ...
    [Serializable]
    public class PropInfo
    {
        public string Name = string.Empty;
        public float[] Position = new float[3];
        public float[] Rotation = new float[4];
        public float[] Scale = new float[3];
    }
}
Save map meta
When you click the Save button in edit view, the map meta is saved. It will first update all object transform then save them to a file.
public void Save()
{
    if (mapData == null)
    {
        return;
    }

    var propInfos = new List<MapMeta.PropInfo>();

    foreach (var prop in mapData.Props)
    {
        var position = prop.transform.localPosition;
        var rotation = prop.transform.localRotation;
        var scale = prop.transform.localScale;

        propInfos.Add(new MapMeta.PropInfo()
        {
            Name = prop.name,
            Position = new float[3] { position.x, position.y, position.z },
            Rotation = new float[4] { rotation.x, rotation.y, rotation.z, rotation.w },
            Scale = new float[3] { scale.x, scale.y, scale.z }
        });
    }
    mapData.Meta.Props = propInfos;

    MapMetaManager.Save(mapData.Meta);
}
Load map meta
The map meta is loaded each time you enter a edit view or preview view after the map is loaded in SparseSpatialMapController.MapLoad event. Objects are created according the templet name, their parents are set to the map. Transform to the map is also restored from the meta data.
controller.MapLoad += (map, status, error) =>
{
    ...
    foreach (var propInfo in meta.Props)
    {
        GameObject prop = null;
        foreach (var templet in PropCollection.Instance.Templets)
        {
            if (templet.Object.name == propInfo.Name)
            {
                prop = UnityEngine.Object.Instantiate(templet.Object);
                break;
            }
        }
        if (!prop)
        {
            Debug.LogError("Missing prop templet: " + propInfo.Name);
            continue;
        }
        prop.transform.parent = controller.transform;
        prop.transform.localPosition = new UnityEngine.Vector3(propInfo.Position[0], propInfo.Position[1], propInfo.Position[2]);
        prop.transform.localRotation = new Quaternion(propInfo.Rotation[0], propInfo.Rotation[1], propInfo.Rotation[2], propInfo.Rotation[3]);
        prop.transform.localScale = new UnityEngine.Vector3(propInfo.Scale[0], propInfo.Scale[1], propInfo.Scale[2]);
        prop.name = propInfo.Name;
        m.Props.Add(prop);
    }
};
Map cache
Sparse spatial map will use a device cache to store the downloaded map. You can clear the cache using SparseSpatialMapManager.clear.
public static void ClearCache()
{
    if (SparseSpatialMapManager.isAvailable())
    {
        using (var manager = SparseSpatialMapManager.create())
        {
            manager.clear();
        }
    }
}
There is a hidden option ViewManager.MainViewRecycleBinClearMapCacheOnly in the sample code to control how clear behaves in ViewManager for test purpose.
public void ClearAll()
{
    ...
    if (!ViewManager.Instance.MainViewRecycleBinClearMapCacheOnly)
    {
        // clear map meta and the list on UI
        foreach (var cell in cells)
        {
            if (cell)
            {
                MapMetaManager.Delete(cell.MapMeta);
                Destroy(cell.gameObject);
            }
        }
        cells.Clear();
    }

    // clear map cache
    MapSession.ClearCache();
    ...
}
By default, ViewManager.MainViewRecycleBinClearMapCacheOnly is false, which means the recycle bin button in main view will clear both map cache and map list. In this case, load map will not trigger a download (cache is built when upload), and statistical request count will not be increased in a subsequent load (when edit or preview).
You can change ViewManager.MainViewRecycleBinClearMapCacheOnly to true to test real cases when you share map through map id you uploaded. In this case, load map after clear (only the first time each map) will trigger a download, and statistical request count will be increased in a subsequent load (when edit or preview). Map cache is used after a successful download and will be cleared if SparseSpatialMapManager.clear is called or app uninstalled. This is case when you distribute your application to let multiple users access the same map.
Map sharing
In this sample, you can create and upload a map, but the map sharing is not showed. That is usually a not difficult task, the only thing you need to know is what information to share. Generally, you need to put server access information which SparseSpatialMapManager need (API key, API secret, and AppID of sparse spatial map service) and the information of the map to share (only Map ID is required) in your application. You can also reference the map meta in this sample about the content sharing and how to restore contents on the map, there is no difference of doing this in another device.
You can also reference the SpatialMap_Sparse_Localizing sample. It takes above information as input. You can setup SpatialMap_Sparse_Localizing sample using one of the maps created from this sample. You will see SpatialMap_Sparse_Localizing sample can localize the map created by this sample even if it is installed on another device.