ImageTracking_Targets
Demonstrate image tracking feature.
Demonstrate different methods to create targets
Demonstrate how to dynamically create targets
Demonstrate how to create a target from ImageTargetData
Demonstrate how to load and unload targets
Demonstrate how to use different center mode
Demonstrate how to use different horizontal flip mode
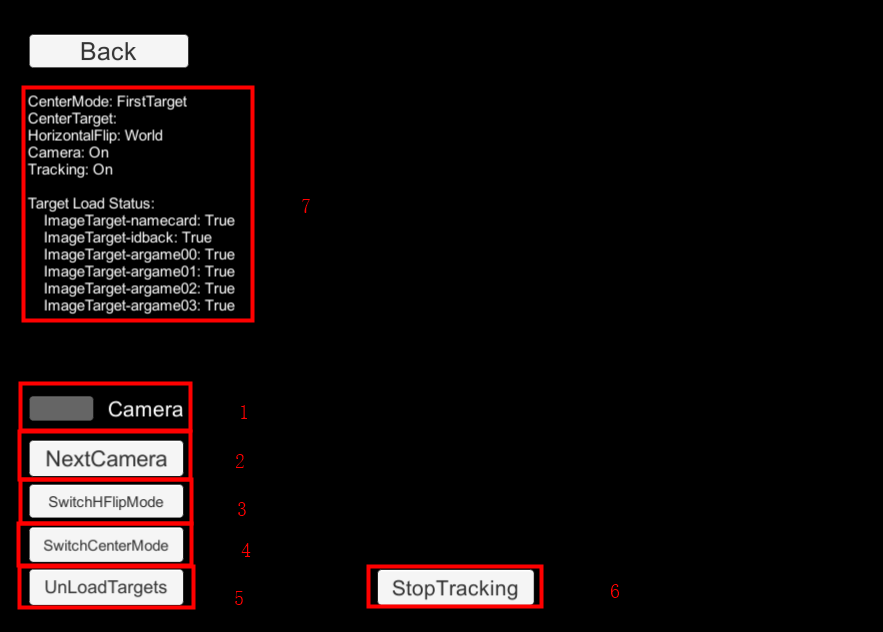
How to Use
How It Works
Targets in the scene
If you want to replace the image in the sample to your own, make sure to choose a .jpg or .png file with rich texture. It is also suggested to read this guide to help choosing a trackable image.
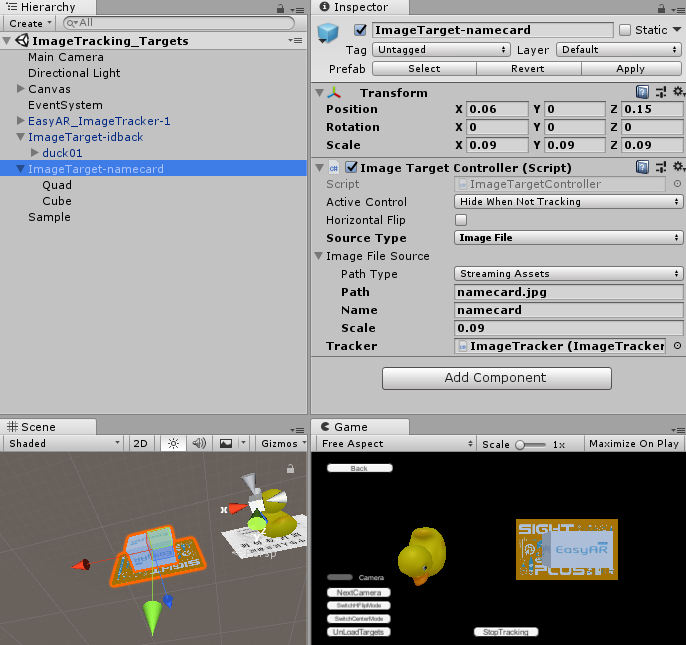
Target can be setup directly from the inspector of Unity editor.
Active Control: Targets and their children will hide when the target is not being tracked. If you need to keep it display when lost, change this value and write your own strategy.
Source Type: Targets are created from Image File or Target Data File depending on this value.
Path Type: StreamingAssets here, so the Path will use a path relative to StreamingAssets.
Path: Image path relative to StreamingAssets in this sample.
Name: Name of the target, choose a world easy to remember.
Scale: It is set according to physical size of the image width in real world.
Tracker: The Tracker to load ImageTarget.
Gizmo are displayed if not disabled in the global settings when the target setting is valid. This will not show in the game view. The namecard image in the game view is a quad in the scene under the ImageTarget-namecard node in the scene.
The transform of the cube and duck have been adjusted so that their bottom will be aligned with the target image. When you run this scene and track the target, the cube and duck will show just on top of the image.
Create targets in script – from images
You can create targets from images in the scripts. It is basically just moving the inspector setup to the script. You first need to create an empty GameObject and add ImageTargetController.
private ImageTargetController CreateTargetNode(string targetName)
{
    GameObject go = new GameObject(targetName);
    var targetController = go.AddComponent<ImageTargetController>();
    ...
}
Then set Tracker, SourceType, ImageFileSource.PathType, ImageFileSource.Path, ImageFileSource.Name, ImageFileSource.Scale value of ImageTargetController like what is done is the inspector.
var targetController = CreateTargetNode("ImageTarget-argame00");
targetController.Tracker = imageTracker;
targetController.SourceType = ImageTargetController.DataSource.ImageFile;
targetController.ImageFileSource.PathType = PathType.StreamingAssets;
targetController.ImageFileSource.Path = "sightplus/argame00.jpg";
targetController.ImageFileSource.Name = "argame00";
targetController.ImageFileSource.Scale = 0.1f;
Add a child object to the GameObject so it will be displayed when the target is tracked.
GameObject duck02 = Instantiate(Resources.Load("duck02")) as GameObject;
duck02.transform.parent = targetController.gameObject.transform;
Create targets in script – from list
You can also create targets from a list with detailed configurations in the scripts. You need to define the list description by your own, the obsolete interface of loading a json file are not supported in the new Sense release. This gives you the flexibility to define your own target description without losing performance.
A json definition like json configuration of EasyAR Sense 1.0 looks like
var imageJosn = JsonUtility.FromJson<ImageJson>(@"
{
    ""images"" :
    [
        {
            ""image"" : ""sightplus/argame01.png"",
            ""name"" : ""argame01""
        },
        {
            ""image"" : ""sightplus/argame02.jpg"",
            ""name"" : ""argame02"",
            ""scale"" : 0.2
        },
        {
            ""image"" : ""sightplus/argame03.jpg"",
            ""name"" : ""argame03"",
            ""scale"" : 1,
            ""uid"" : ""uid string will be ignored""
        }
    ]
}");
Just create the targets in a loop, all time-consuming procedures are handled in background threads.
foreach (var image in imageJosn.images)
{
    targetController = CreateTargetNode("ImageTarget-" + image.name);
    targetController.Tracker = imageTracker;
    targetController.ImageFileSource.PathType = PathType.StreamingAssets;
    targetController.ImageFileSource.Path = image.image;
    targetController.ImageFileSource.Name = image.name;
    targetController.ImageFileSource.Scale = image.scale;

    var duck03 = Instantiate(Resources.Load("duck03")) as GameObject;
    duck03.transform.parent = targetController.gameObject.transform;
}
Target events
Target events are used for custom operations, the sample use the events to output some logs. You can delete the logs if they are not used, and you can use the events to handle your game logic.
controller.TargetFound += () =>
{
    Debug.LogFormat("Found target {{id = {0}, name = {1}}}", controller.Target.runtimeID(), controller.Target.name());
};
controller.TargetLost += () =>
{
    Debug.LogFormat("Lost target {{id = {0}, name = {1}}}", controller.Target.runtimeID(), controller.Target.name());
};
controller.TargetLoad += (Target target, bool status) =>
{
    Debug.LogFormat("Load target {{id = {0}, name = {1}, size = {2}}} into {3} => {4}", target.runtimeID(), target.name(), controller.Size, controller.Tracker.name, status);
};
controller.TargetUnload += (Target target, bool status) =>
{
    Debug.LogFormat("Unload target {{id = {0}, name = {1}}} => {2}", target.runtimeID(), target.name(), status);
};
Target load and unload
Target load and unload is very easy. Set ImageTargetController.Tracker to null, the target will be unloaded, and set it to some tracker will make the target loaded into the tracker immediately.
public void UnloadTargets()
{
    foreach (var item in imageTargetControllers)
    {
        item.Key.Tracker = null;
    }
}

public void LoadTargets()
{
    foreach (var item in imageTargetControllers)
    {
        item.Key.Tracker = imageTracker;
    }
}
Tracking on/off
Image tracking can be turned on or off using ImageTrackerFrameFilter.enabled. You can turn the tracking off when it is not used to save performance, it will not turn off the camera or any other tracking features.
public void Tracking(bool on)
{
    imageTracker.enabled = on;
}
Camera on/off
Camera device can be turned on or off using VideoCameraDevice.enabled. If a camera has turned off, the tracker will not receive any frames and the whole AR chain will stop.
public void EnableCamera(bool enable)
{
    cameraDevice.enabled = enable;
}
Center mode
Three mode of ARSession.CenterMode are valid in object sensing.
In ARSession.ARCenterMode.Camera, the camera do not automatically move when the device moves.
In ARSession.ARCenterMode.FirstTarget or ARSession.ARCenterMode.SpecificTarget, the camera will move automatically when the device moves, and the target stay.

To show the differences between ARSession.ARCenterMode.FirstTarget and ARSession.ARCenterMode.SpecificTarget, we change the tracker settings to track two targets.
In ARSession.ARCenterMode.FirstTarget mode, the camera will always move when there is some target being tracked, and the center will be the first tracked target or any other target when it is lost.
When the center target not changing, ARSession.ARCenterMode.SpecificTarget mode will always use the specified target as center when it is tracked, and the camera stay when the target is lost.
ARSession.CenterMode can be modified at any time and it will take effect immediately.
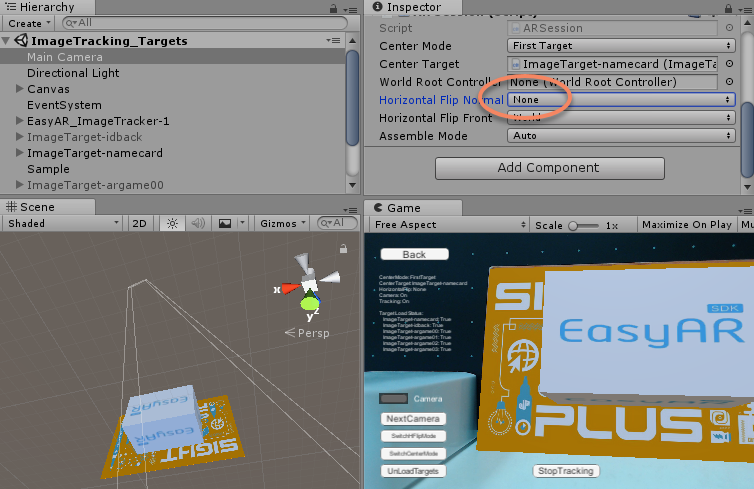
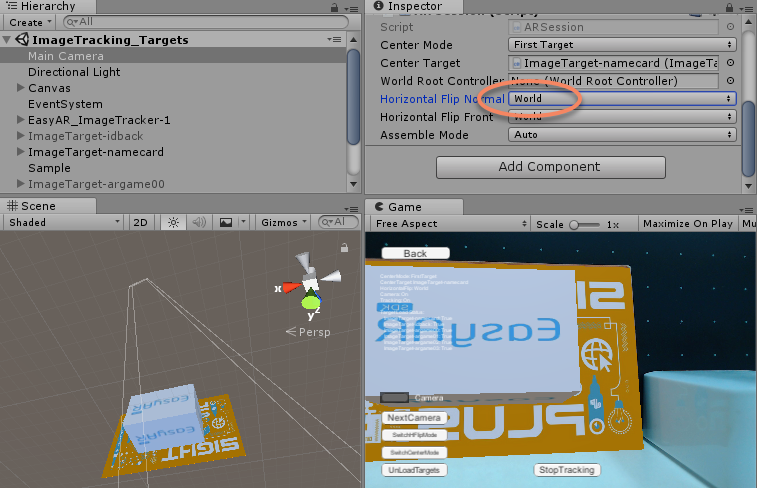
Flip camera image horizontally
ARSession.HorizontalFlipNormal and ARSession.HorizontalFlipFront controls how the camera is mirrored. When the camera image is mirrored, the camera projection or the target scale will change so that a tracking behavior continues.
ARHorizontalFlipMode.None do not make a flip.
In ARHorizontalFlipMode.World mode, the camera image will be flipped in rendering, the camera projection matrix will be changed to do flip rendering. Target scale will not change. Changing of projection matrix will have side effect to all other objects displayed in the scene, you can use ARHorizontalFlipMode.Target if it annoys you.
In ARHorizontalFlipMode.Target mode, the camera image will be flipped in rendering, the target scale will be changed to do flip rendering. Camera projection matrix will not change.
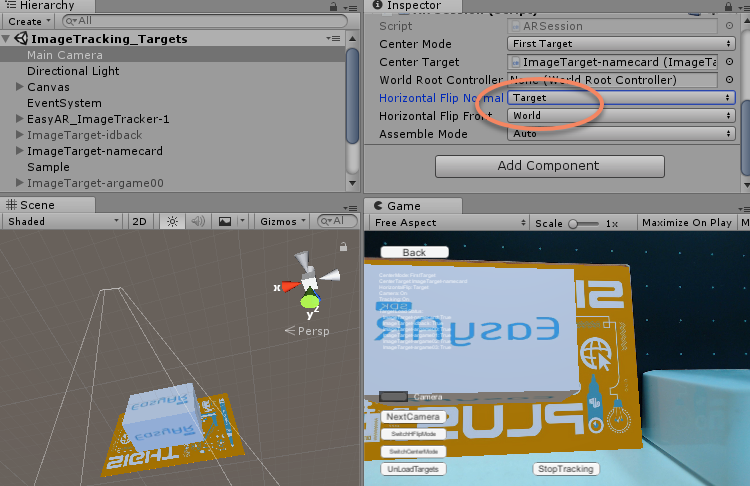
ARSession.HorizontalFlipNormal and ARSession.HorizontalFlipFront can be modified at any time and it will take effect immediately.