SpatialMap_Sparse_AllInOne

Attention

The content of this page will be updated soon.

Note

This sample supports AR Foundation (it can also work without AR Foundation). If you want to use AR Foundation, please refer to AR Foundation Configuration for configuration.

Demonstrate how to use sparse SpatialMap.

  • Demonstrate how to create sparse SpatialMap

  • Demonstrate how to put virtual objects onto SpatialMap

  • Demonstrate how to preview persistence contents

  • Demonstrate how to localize multiple maps and show contents on them

Reference: Motion Tracking and EasyAR Features.

Configurations

Server access information is required when using sparse spatial map, which can be get from SpatialMap page in EasyAR develop center. There are two ways to set this information in Unity.

One is global configuration, EasyAR Settings Spatial Map > Service Access [Global],

Another is local configuration in the scene, it is only valid to the current scene.

SampleOneShotRendererFeature should be added to Renderer Data if URP is in use.

How to Use

Main view

../../_images/image_s14_1.png
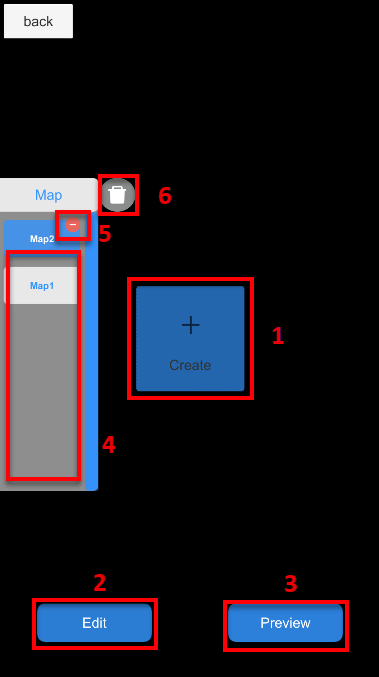
Mark 1: Enter create view to create spatial map.
Mark 2: Enter edit view to put 3D content on spatial map and save the scene.
Mark 3: Enter preview view to preview contents on the map added in the edit view.
Mark 4: Map list, selection can be used for editing or preview.
Mark 5: Delete the selected map.
Mark 6: Delete all maps and caches. The behaviour can be changed by ViewManager.MainViewRecycleBinClearMapCacheOnly.
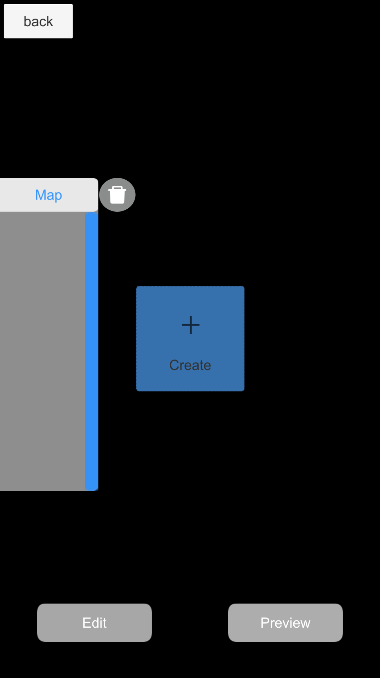
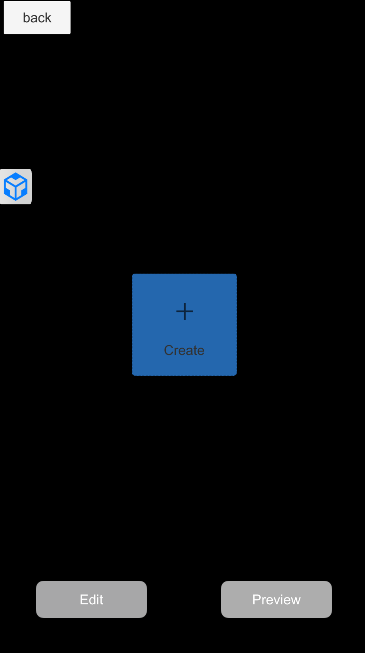
../../_images/image_s14_2.png ../../_images/image_s14_3.png

Click the black part of the view can collapse and expand the map list.
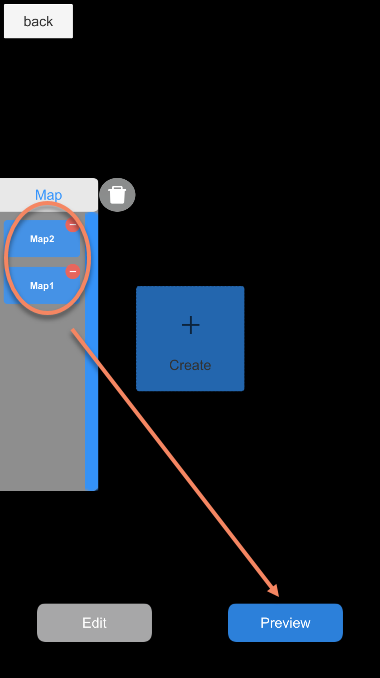
../../_images/image_s14_4.png ../../_images/image_s14_5.png

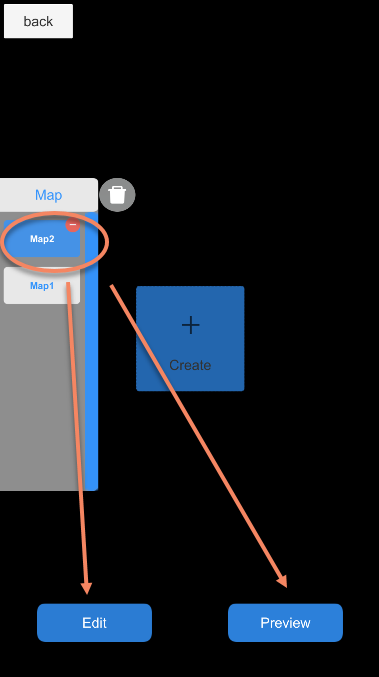
The map list is empty at beginning and filled with maps after create.

Select one map from the list, then click Edit to put 3D content and click Preview to preview the contents.

Select multiple maps from the list, only preview can be clicked, and this sample will detect and track all maps.

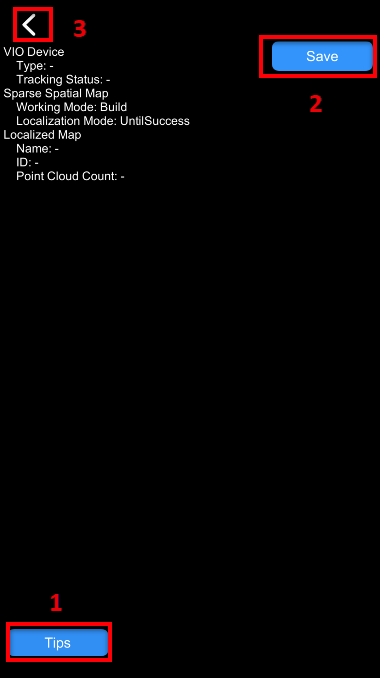
Create view

../../_images/image_s14_6.png ../../_images/image_s14_7.png
Mark 1: Open/Close operation tips.
Mark 2: Open save popup window for map saving.
Mark 3: Return to main view.
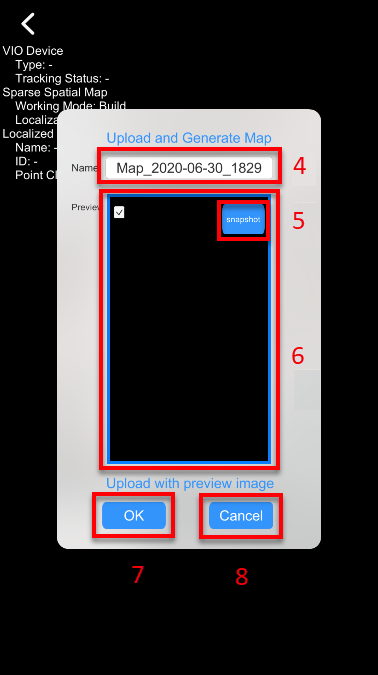
Mark 4: Map name. It will have a auto generated name filled by default, changeable before upload.
Mark 5: Capture current view as preview image. The preview image is automatically created when click save button and is changeable using this button before upload.
Mark 6: Control whether to upload map with preview image. The whole region can be clicked to change the selection, and the popup title will change accordingly. If you do not want the image to be uploaded, click until the checkbox is not selected.
Mark 7: Upload and generate map. The upload may take some time, the popup will despair and return to main view after a success upload. If the upload fails, you can retry or cancel.
Mark 8: Cancel upload and return to main view.

Edit view

../../_images/image_s14_8.png
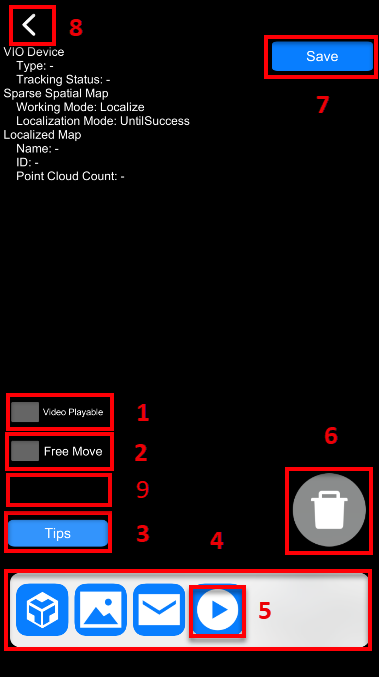
Mark 1: Toggle the video playable. If selected, the video can be played when selected.
Mark 2: Toggle free move. You can move object to any place in the 3D space if selected, or move snap to the point cloud in not.
Mark 3: Open/Close operation tips.
Mark 4: Templet list, stores object templets that can be instantiated.
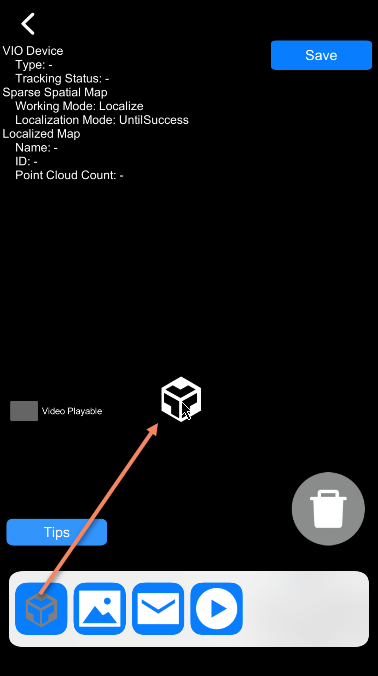
Mark 5: Templet icon. You can drag an icon to the map point cloud, the icon will become an object in 3D space.
Mark 6: Delete current selected object in the scene.
Mark 7: Save current scene. After save, the next time enter edit view or preview view using the same map, all contents will recover to the location where they were at save time.
Mark 8: Return to main view.
Mark 9: Toggle point cloud display. The button is only visible when a map is localized.
../../_images/image_s14_9.png ../../_images/image_s14_10.png

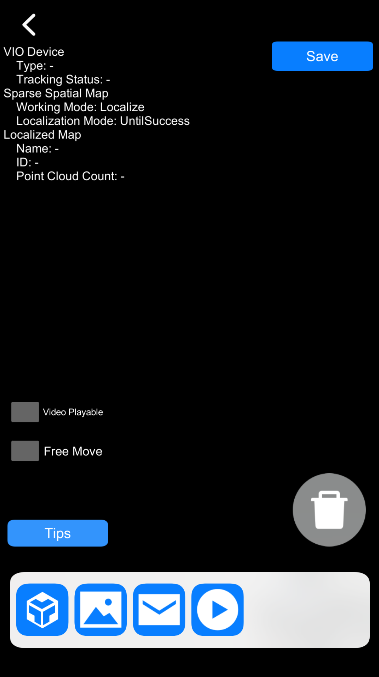
Templet icon can be dragged into the scene. If there is a map localized, drag the icon on the point cloud will generate an object in 3D scene. You can drag it multiple times and multiple objects will be created.

Contents of the preset four buttons are cube, namecard image, red packet model and video.

Preview view

../../_images/image_s14_11.png
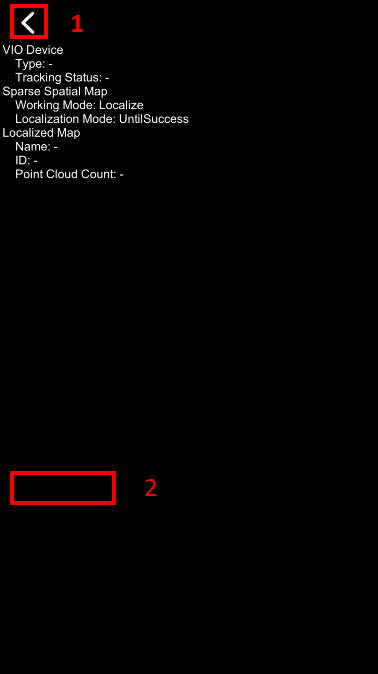
Mark 1: Return to main view.
Mark 2: Toggle point cloud display. The button is only visible when a map is localized.